
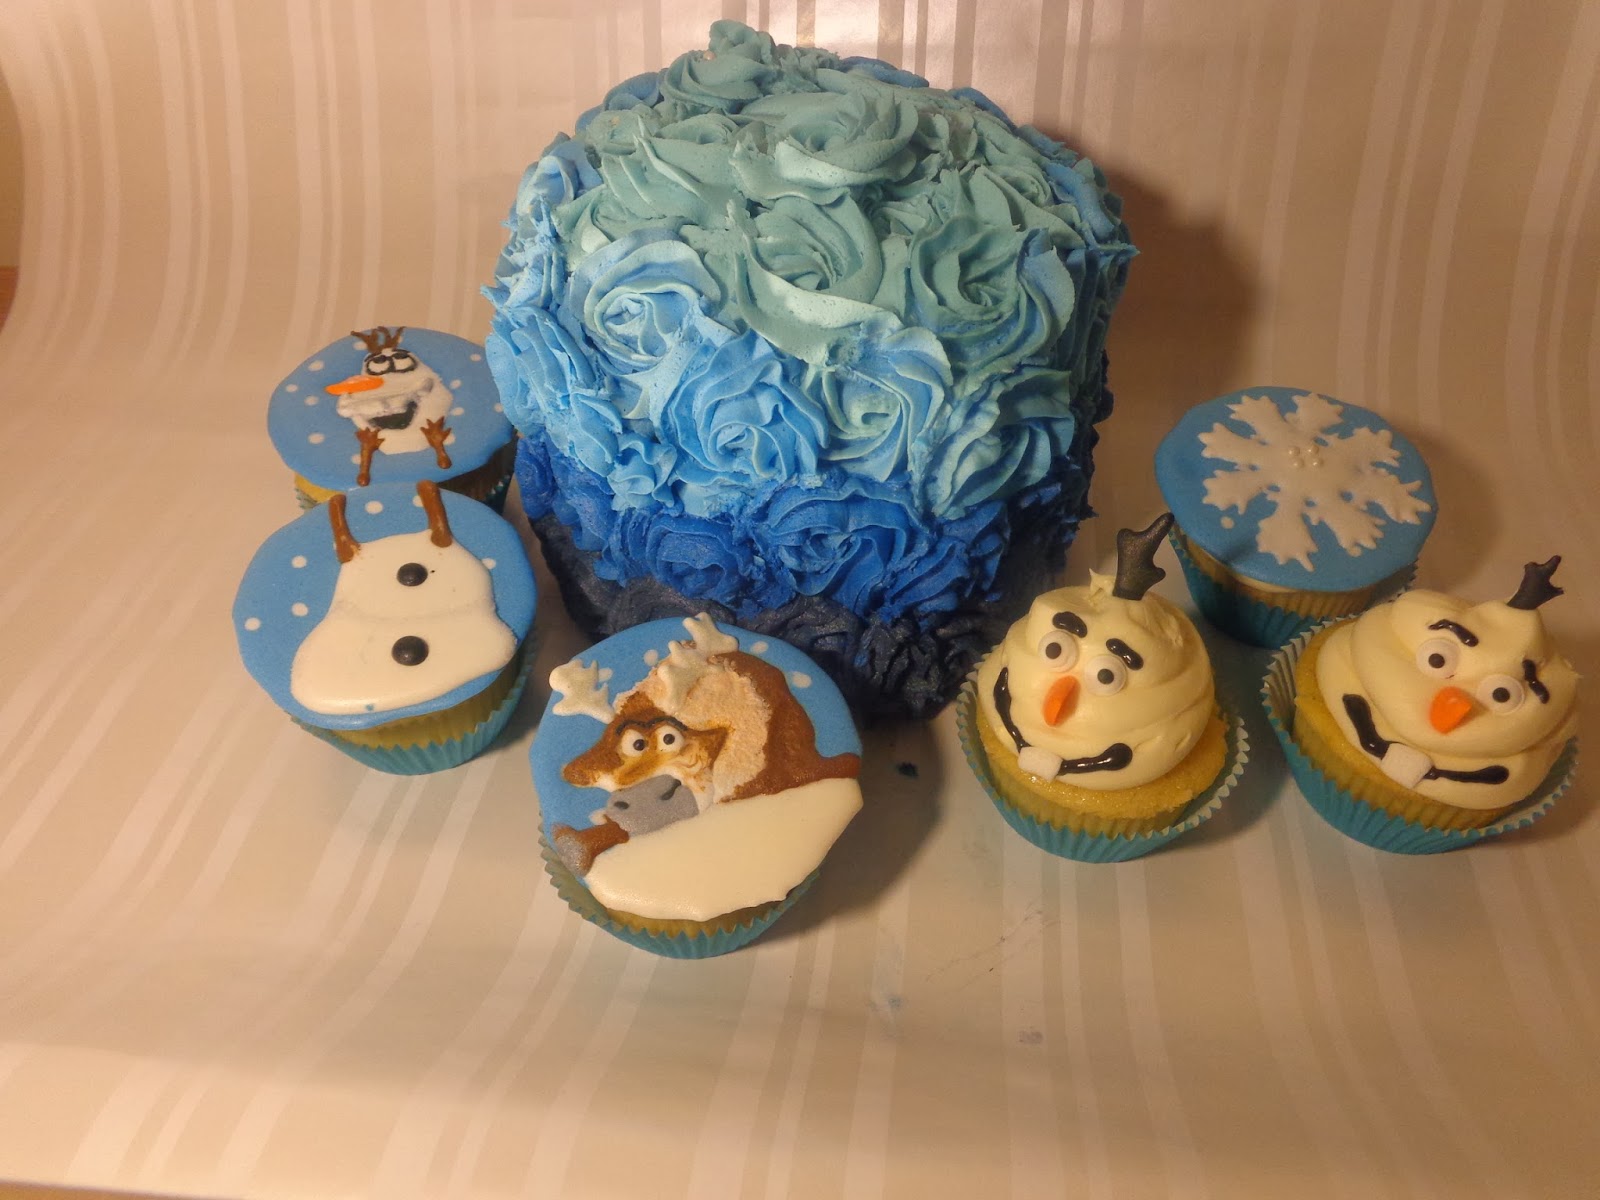

You can also apply these techniques on top of a piece of wax or parchment paper to create a royal icing transfer. These transfers can be placed on top of any plain cupcake to really make it pop. As seen in my Disney's Frozen cupcake tutorial, linked down below, creating a royal icing transfer can be much like painting a picture. Although it is a long process because of the time it takes for royal icing to dry (this can take anywhere from four hours to overnight depending on its thickness), it is not at all difficult for someone to achieve with a steady hand.
 For these Frozen toppers I simply just colored in the template that I hand drew with some royal icing in a piping bag. This same technique can be used for almost any royal icing transfer design. For one design, you can apply wet on wet to achieve such patterns as the snowflakes that you see in the background of these toppers. To create characters, for example Olaf and Sven, you should allow each layer of icing to dry completely to avoid the colors bleeding together. Another tip is to make sure each piece of your design is thick enough so when it is pulled off the wax paper/parchment paper it does not break. Royal icing transfers break easily when peeling off the paper, so always, always, always, make extra.
ICING CONSISTENCIES
Different consistencies of royal icing can also help you create different designs. With the Frozen toppers I used flood consistency, also known as 14 second icing, throughout the entire project. Flood consistency icing is used to fill in large portions because it spreads evenly. To tell if your icing is flood consistency, simply just cut a knife through the icing while in a bowl, and if the line created from the knife in the icing takes about 14 seconds to disappear, you have flood consistency icing. If it takes less time than that, you have added too water, and your icing will be too thin. Outlining consistency is just a bit thicker than flood consistency. This will create borders to your designs and can also be used to make patterns such as lines and dots as seen in these Easter egg cookies by marthastewart.com.
Last is piping icing. This is the thickest royal icing and can be used to make 3D details and transfers. With piping icing you can create flowers, bead work, lace designs, and even more intricate borders and lines.
HOW TO MAKE ROYAL ICING
Royal icing is simple to make and only uses three ingredients: water, powdered sugar, and meringue powder (or two large egg whites).
- Simply mix together two bags of powdered sugar (4lbs) and 3/4 cups of meringue powder (or two large egg whites). Before I add in the water, I whisk together the two powders.
- Although the recipe calls for 1 1/3 cup of water, add in the water a few drops at a time. This will help you get to the right consistency without making your icing too thin. Continue to add water until you get your desired consistency.
- Lastly, as an option, you can add a flavored extract to your liking just be sure it is oil free.
To watch my tutorial on how to make these Frozen royal icing transfer, just click play below. Visit my channel at youtube.com/josiescupcakes for even more videos!
This was a whole lot of information so if you have any questions or comments, please feel free to comment below or e-mail me at josiescupcakes@outlook.com and I'll get back to you as soon as I can!
No comments:
Post a Comment